Before You Start
Windows 11 or Windows Server 2022 / 2025 (64-bit)
Older versions of Windows are not supported.
NVIDIA GPU with CUDA support — RTX 20-series or newer recommended
The installer auto-detects your GPU and picks the right PyTorch wheels (CUDA 13.0, falling back to cu124).
Administrator privileges
Required to install services, open firewall rules, and write to the selected drive.
Step-by-Step Installation
1
Download and Extract
Download ComfyUI-Installer.zip from the Downloads page.
Once downloaded, right-click the ZIP file and select Extract All, then choose a destination folder such as your Desktop or Downloads.
2
Run as Administrator
Open the extracted folder, right-click ComfyUI-Installer.exe, and select Run as administrator.
When prompted by User Account Control, click Yes to allow it to run with elevated privileges.
Must run as Administrator. The installer registers a Windows service, configures the firewall, and writes to system locations — all of which require elevated permissions.
3
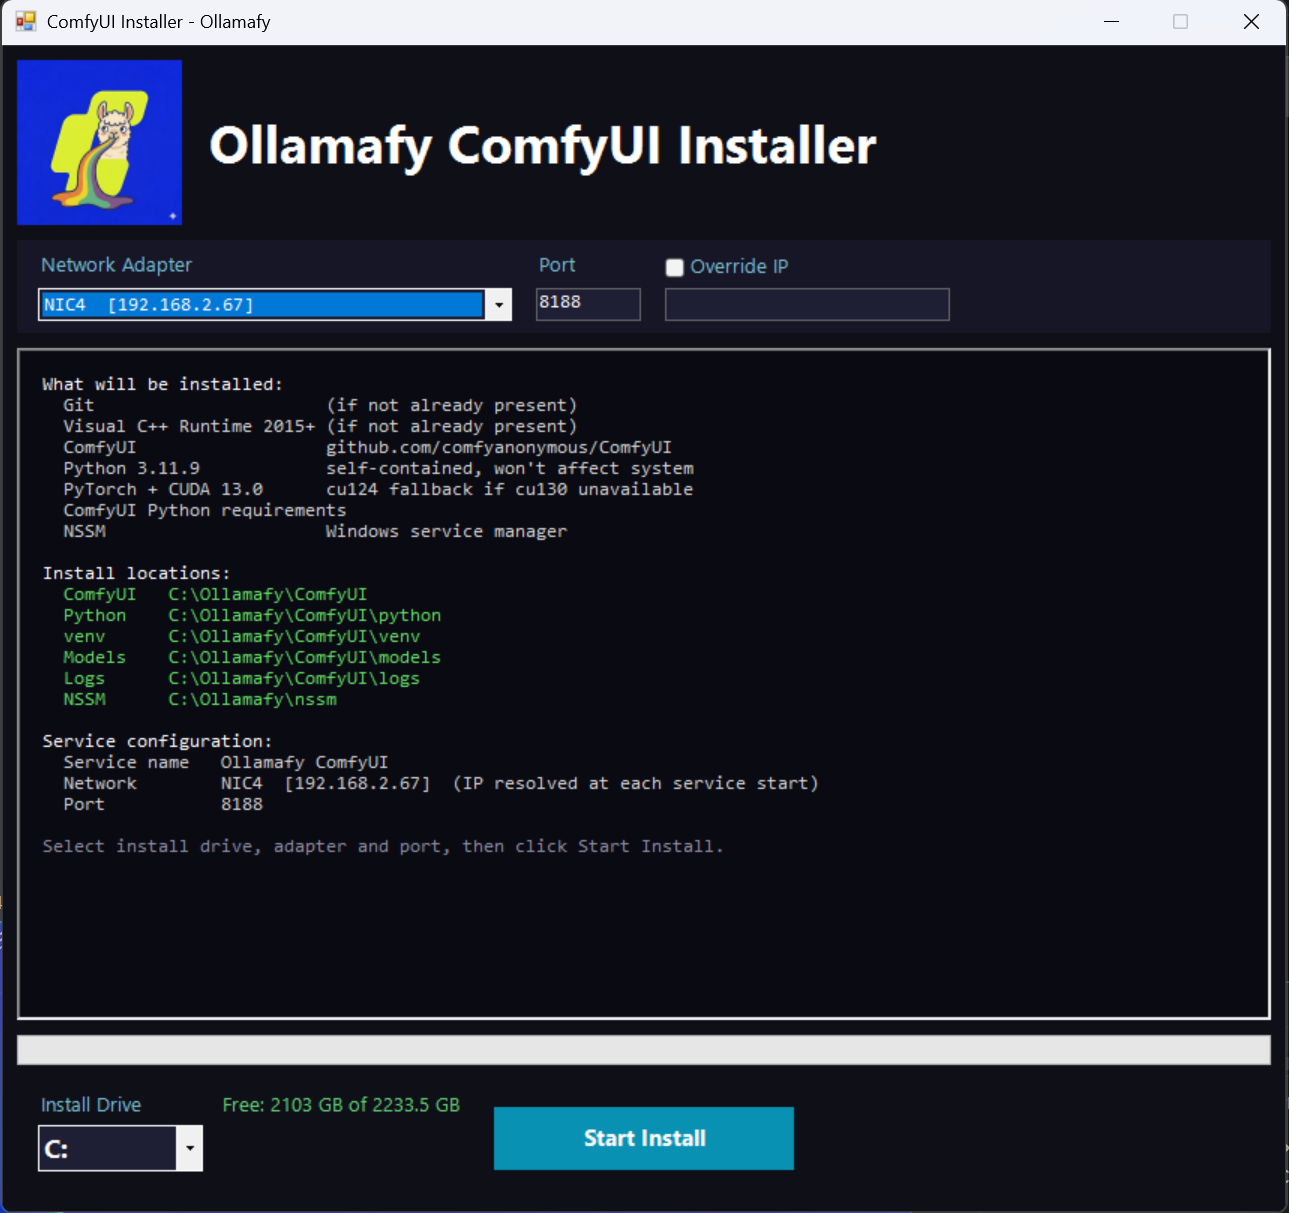
Choose Install Drive
Select the drive you want to install ComfyUI to. The installer will place ComfyUI, Python, and the virtual environment at
DRIVE:\Ollamafy\ComfyUI\.
At least 10 GB of free space is recommended — PyTorch and its CUDA dependencies are large.
4
Click Install
Click the Install button. The installer automatically handles every step:
- ›Installs Git and Visual C++ Runtime if missing (via winget)
- ›Installs Python 3.11 in an isolated directory
- ›Clones ComfyUI from GitHub
- ›Creates a virtual environment and installs all Python dependencies
- ›Installs PyTorch with CUDA (auto-selects the right build for your GPU)
- ›Registers ComfyUI as a Windows service via NSSM
- ›Opens the firewall rule for port 8188
Real-time progress is shown in the log panel throughout the installation so you can see exactly what is happening.
5
Wait for Completion
PyTorch and its dependencies are large — the download and install step may take several minutes depending on your internet connection.
The progress bar and log panel show what is happening at each stage. Do not close the window while the installation is running.
6
Installation Complete
Once the log panel shows Installation Complete, ComfyUI is running as a Windows service on port 8188
and will start automatically every time Windows boots.
A desktop shortcut is created pointing to your ComfyUI URL.
7
Open ComfyUI
Open a browser and navigate to the URL shown at the end of the install — for example http://192.168.1.10:8188 — or double-click the ComfyUI shortcut on the Desktop.
On first launch, ComfyUI may take a moment to load while it initialises.
Managing the Service
Once installed, ComfyUI runs as a standard Windows service and can be started, stopped, or restarted from the Windows Services Manager like any other service.
1️⃣
Press Windows + R, type services.msc, and press Enter to open the Services Manager.
2️⃣
Scroll down the list and locate ComfyUI.
3️⃣
Right-click the service and select Start, Stop, or Restart as needed.
The Startup Type is set to Automatic by the installer, so ComfyUI will start with Windows automatically.
If ComfyUI does not start as expected, check the service logs at DRIVE:\Ollamafy\ComfyUI\logs\

Ready to install?
Download the installer and have ComfyUI running as a Windows service in minutes.
Download Installer Download Source View product page →