Before You Start
Windows 10 / 11 or Windows Server 2019/2022/2025 (64-bit)
Administrator privileges
Required to install services, configure firewall rules, and write to the selected drive.
Internet connection
The installer downloads Ollama, Python, and Open WebUI automatically during setup.
Step-by-Step Installation
1
Download and Extract
Download OllamafyInstaller.zip from the Downloads page.
Once downloaded, right-click the ZIP file and select Extract All, then choose a destination folder such as your Desktop or Downloads.
2
Run as Administrator
Open the extracted folder, right-click Install Ollamafy.exe, and select Run as administrator.
If prompted by User Account Control, click Yes to allow it to run with administrator privileges.
Must run as Administrator. The installer registers Windows services, configures firewall rules, and writes files to your selected drive — all of which require elevated permissions.
3
Choose Install Drive
Use the Drive dropdown to select where Ollama and Open WebUI will be installed.
All files will be placed under DRIVE:\Ollamafy\.
Make sure the selected drive has at least 5 GB free.
4
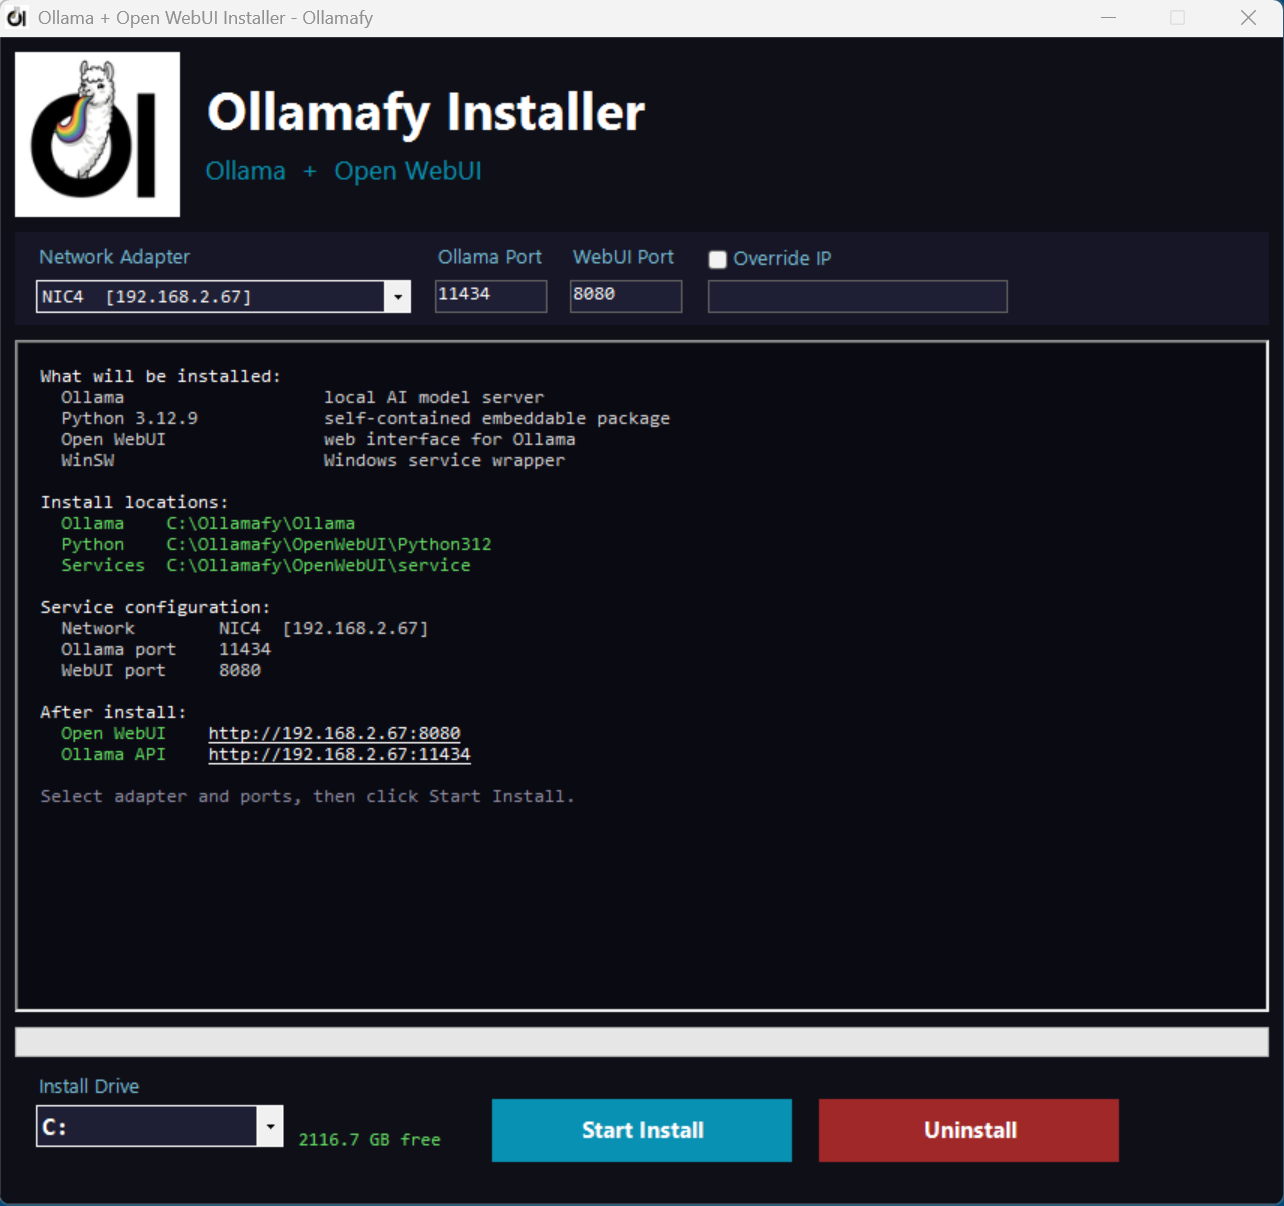
Select Network Adapter
Choose the network adapter Ollama and Open WebUI should listen on from the dropdown.
This is useful for making them available to other devices on your network — simply select your LAN adapter.
5
Configure Ports
The default port for Ollama is 11434 and for Open WebUI is 8080.
Change either port if they are already in use on your machine.
6
Click Install
Click the Install button. The installer silently downloads and installs all components — Ollama, Python, and Open WebUI — with real-time progress shown in the log panel.
7
Installation Complete
Once complete, the log panel shows Installation Complete.
Both services are registered to start automatically with Windows.
A desktop shortcut is created pointing directly to Open WebUI.
8
Open Open WebUI
Open a browser and navigate to the URL shown at the end of the install — for example http://192.168.1.10:8080 — or double-click the Open WebUI shortcut on the Desktop.
Ollama is available at port 11434 for use with AI tools and other integrations.
Managing the Services
Once installed, Ollama and Open WebUI run as standard Windows services and can be started, stopped, or restarted from the Windows Services Manager like any other service.
1️⃣
Press Windows + R, type services.msc, and press Enter to open the Services Manager.
2️⃣
Scroll the list and locate Ollama and Open WebUI Ollamafy.
3️⃣
Right-click either service and select Start, Stop, or Restart as needed.
The Startup Type is set to Automatic by the installer, so both services start with Windows automatically.

Ready to install?
Download the installer and have Ollama and Open WebUI running as Windows services in minutes.
Download Installer Download Source View product page →